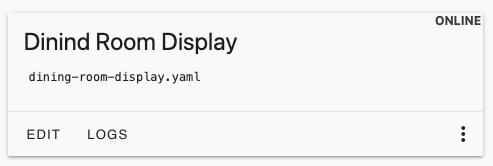
Power-Flow-Display
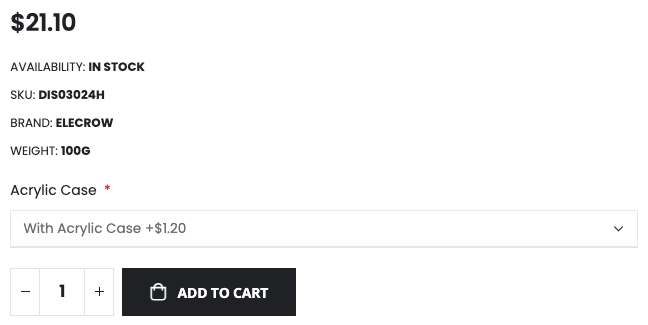
I purchased this screen from Elecrow, it is only 2.4 inches so small making sure I selected with case
This process will only work on screens that have ili9xxx displays
The one I purchased uses model: ili9341
Flashing with ESPHome
In Home-Assistant go to ESPHome Click + New Device at the Bottom
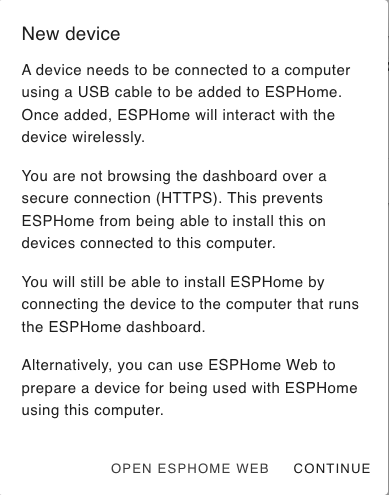
Click Continue
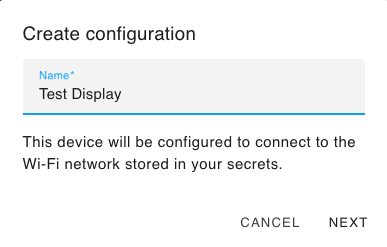
Give it an appropriate name then click Next
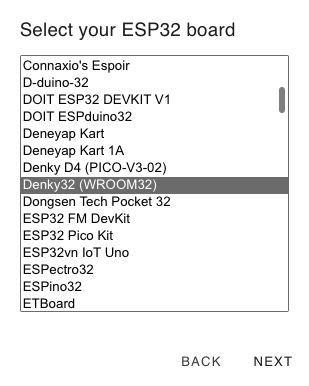
Untick Use “recommended settings” at the bottom and select ESP32
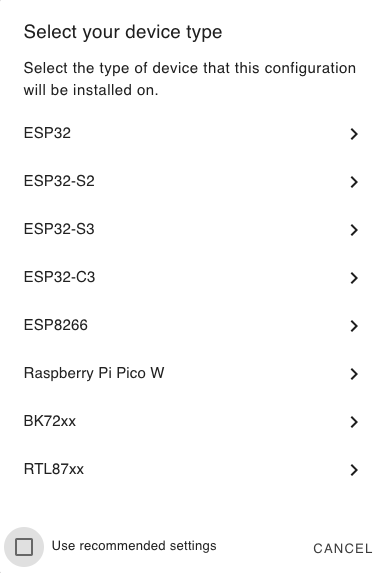
Select “Denky32 (WROOM32)” then click Next
Click install
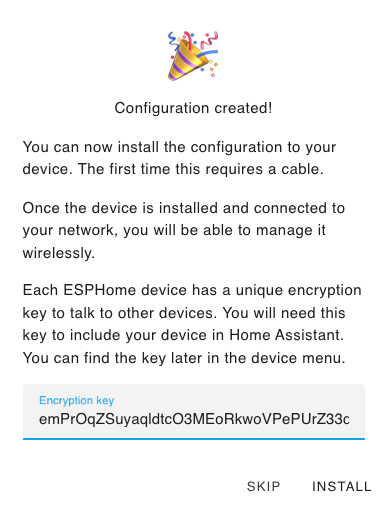
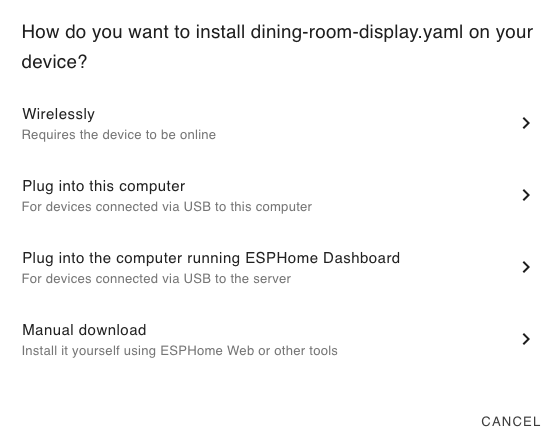
Select “Plug into this computer”

Wait for the .bin file to be created
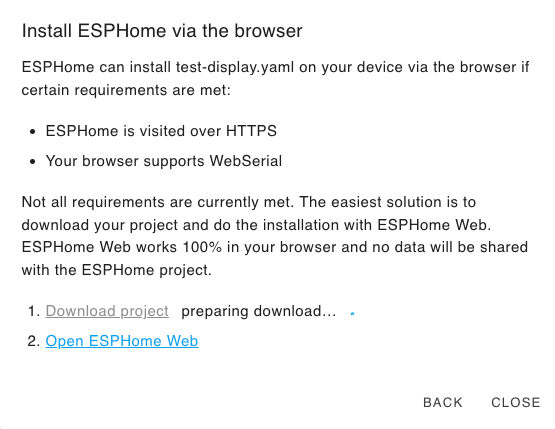
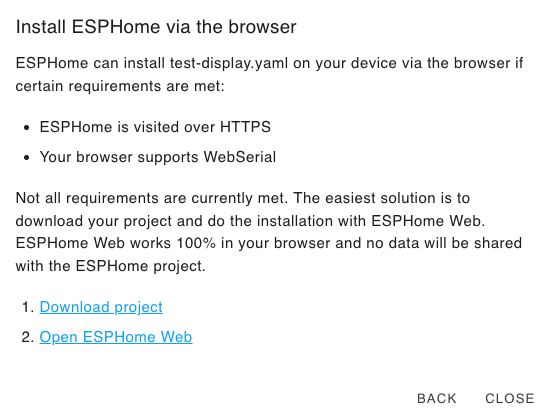
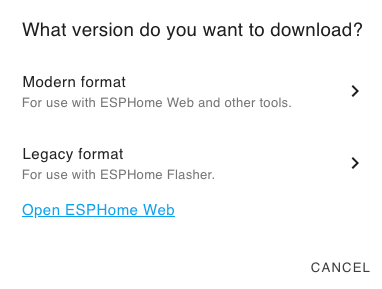
Once the .bin file has been created click “Download project” to download it to your computer.
If asked select “Modern format”
Follow the link “Open ESPHome Web:
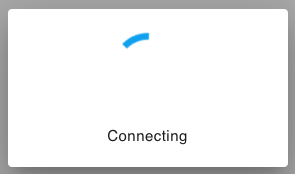
Click “Connect”
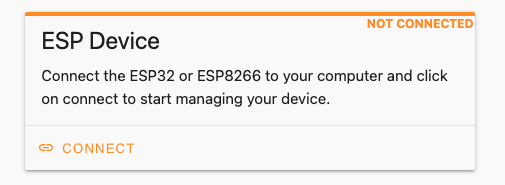
Now connect the screen to your computer and a new device will appear
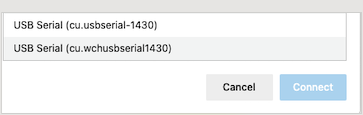
Select the new Device and click Connect
Click on “Install”
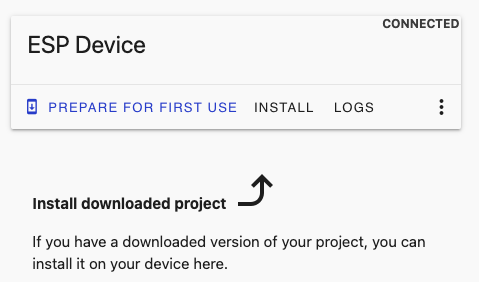
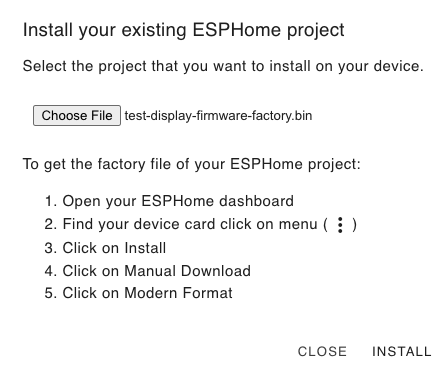
Click “Chose file” and select the previously downloaded file
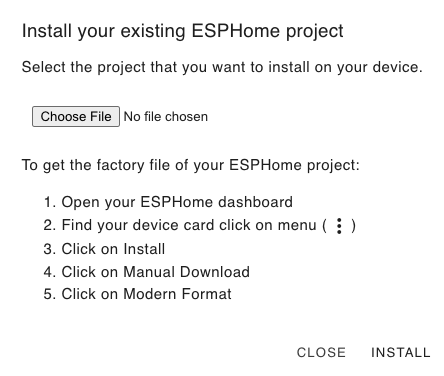
Then click “Install”
You will now see
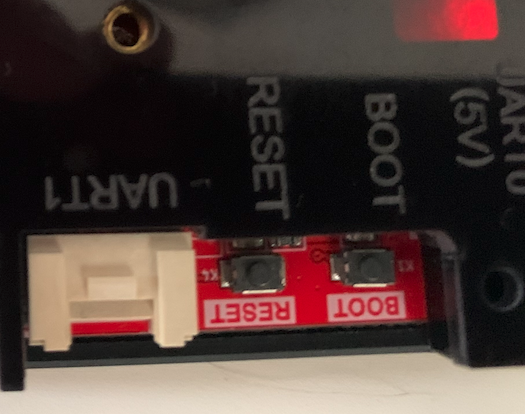
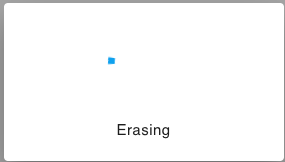
Put the device in “Boot mode” to do this Hold the “Boot” button then press the “Reset” button
keeping hold of the “Boot” button till you see “Erasing” on screen
Device is being Erased
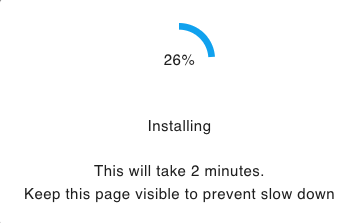
The device is now installing the .bin file
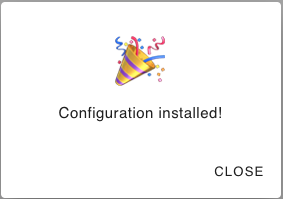
Install has finished when you see this
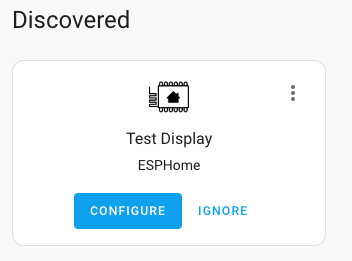
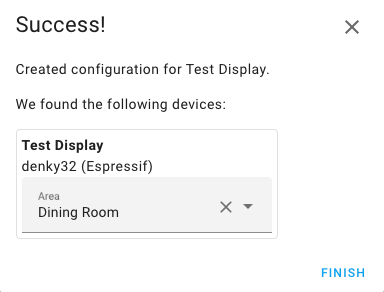
Go into Home-Assistant –> Settings –> Devices & Services and your new Display will be visible and ready for you to add.
Click Configure then Submit

Place it in an appropriate Area then click Finish
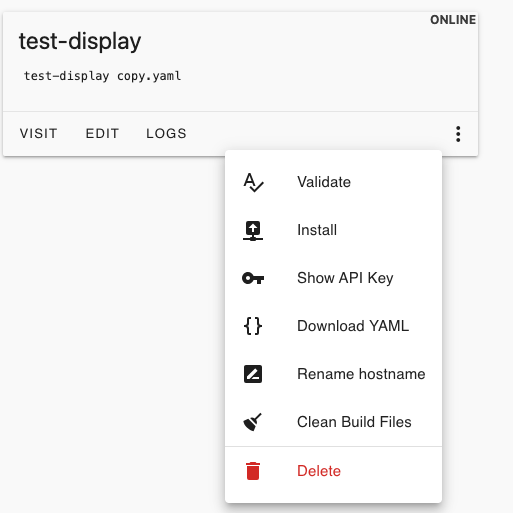
Inside ESPHome I did not like this name so clicked on the 3 dots in the bottom right
Then Clicked “Rename hostname:
Gave it a more friendly name
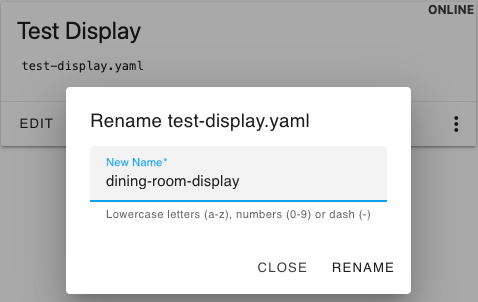
Then clicked RENAME
Waited for it do do the rename and re-upload the code to the ESP
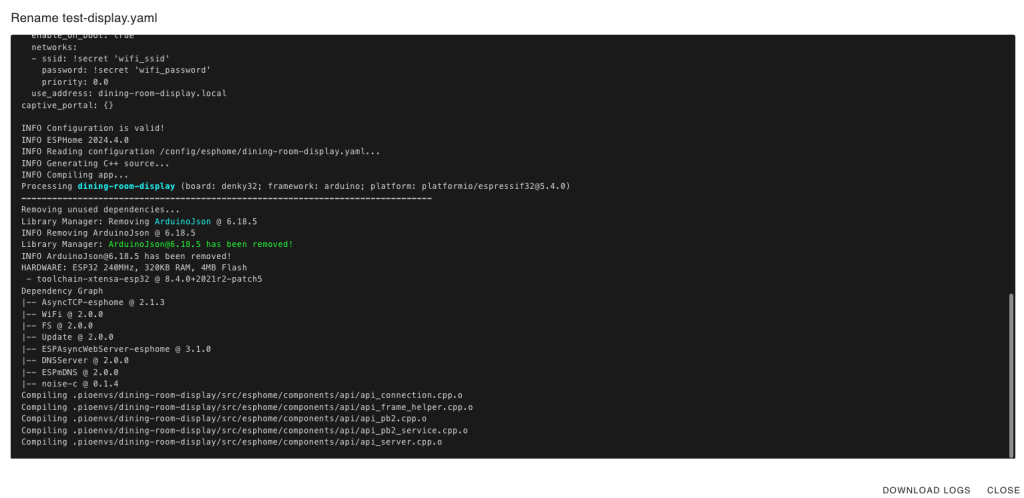
When you see SUCSESS you can close that screen

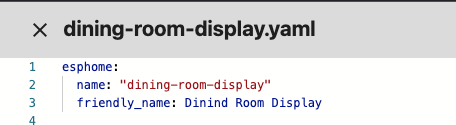
The friendly name is still Test Display so click Edit
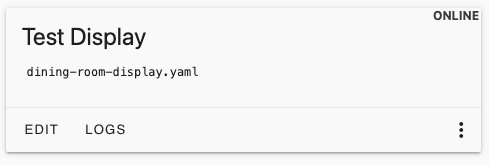
Change the Friendly name to something more appropriate
Then click Save
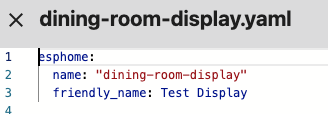
Go back in and here is the current code
esphome:
  name: "dining-room-display"
  friendly_name: Dinind Room Display

esp32:
  board: denky32
  framework:
    type: arduino

# Enable logging
logger:

# Enable Home Assistant API
api:
  encryption:
    key: "gOHjB/wcnG54xi3y+rsKtly+3BJ9H9h/HxmPVu2RH6I="

ota:
  password: "8fa8a3962112d6fad073fcfd600ea71a"

wifi:
  ssid: !secret wifi_ssid
  password: !secret wifi_password

  # Enable fallback hotspot (captive portal) in case wifi connection fails
  ap:
    ssid: "Test-Display Fallback Hotspot"
    password: "LJrLWeIDacfr"

captive_portal:
I like to use the same API and OTA code on all the devices so in the secrets file I have
api_key: "MY_API_LONG_CODE"
ota_password: "MY_OTA_LONG_CODE"
web_server_user: "user_name"
web_server_password: "user_password"
So the new code will look like
esphome:
  name: "dining-room-display"
  friendly_name: Dinind Room Display

esp32:
  board: denky32
  framework:
    type: arduino

# Enable logging
logger:

# Enable Home Assistant API
api:
  encryption:
    key: !secret api_key

ota:
  password: !secret ota_password

wifi:
  ssid: !secret wifi_ssid
  password: !secret wifi_password

  # Enable fallback hotspot (captive portal) in case wifi connection fails
  ap:
    ssid: "Dinind Room Display Hotspot"
    password: !secret web_server_password

captive_portal:
Once you are happy with the above code you need to add the code for the functionality
esphome:
  name: "dining-room-display"
  friendly_name: Dinind Room Display

esp32:
  board: denky32
  framework:
    type: arduino

# Enable logging
logger:

# Enable Home Assistant API
api:
  encryption:
    key: !secret api_key

ota:
  password: !secret ota_password

wifi:
  ssid: !secret wifi_ssid
  password: !secret wifi_password

  # Enable fallback hotspot (captive portal) in case wifi connection fails
  ap:
    ssid: "Dinind Room Display Hotspot"
    password: !secret web_server_password

captive_portal:

############ Put the Wifi settings into a text sensor ############
text_sensor:
  - platform: wifi_info
    ip_address:
      name: ESP IP Address
      id: ip_address
    ssid:
      name: ESP Connected SSID
      id: ssid
############ Put the Wifi settings into a text sensor ############

############ Create a web page to monitor the device for fault finding ############
web_server:
  version: 2
  port: 80
  auth:
    username: admin
    password: !secret web_server_password
############ Create a web page to monitor the device for fault finding ############

############ Add some standard fonts ############
font:
  - file: 'dining-room-display/slkscr.ttf'
    id: font1
    size: 10

  - file: 'dining-room-display/BebasNeue-Regular.ttf'
    id: font2
    size: 48

  - file: 'dining-room-display/arial.ttf'
    id: font3
    size: 22

  - file: 'dining-room-display/arial.ttf'
    id: font5
    size: 13

  - file: 'dining-room-display/arial.ttf'
    id: font4
    size: 18
############ Add some standard fonts ############

############ Add a switch to reboot from Home-Assistant and set the LED states on the board ############
switch:
  - platform: restart
    name: "${device_name} Restart"
  - platform: gpio
    name: "led"
    id: led24
    pin: 25
    inverted: no
    restore_mode: ALWAYS_OFF
  - platform: gpio
    name: "bck"
    id: bck24
    pin: 27
    inverted: no
    restore_mode: ALWAYS_ON
############ Add a switch to reboot from Home-Assistant and set the LED states on the board ############

i2c:
  sda: 22
  scl: 21

############ Get the entities from Home-Assistant you want to display ############
# You need to change these Home Assistant entities to match yours that you want to display
time:
  - platform: homeassistant
    id: esptime

sensor:
  - platform: homeassistant
    id: pv_power
    entity_id: sensor.deye_sunsynk_sol_ark_pv_power
  - platform: homeassistant
    id: load_power
    entity_id: sensor.deye_sunsynk_sol_ark_load_power
  - platform: homeassistant
    id: battery_power
    entity_id: sensor.deye_sunsynk_sol_ark_battery_power
  - platform: homeassistant
    id: grid_power
    entity_id: sensor.deye_sunsynk_sol_ark_grid_power
  - platform: homeassistant
    id: grid_in_cost
    entity_id: sensor.grid_cost_cost
  - platform: homeassistant
    id: grid_out_cost
    entity_id: sensor.grid_out_saving_cost
  - platform: homeassistant
    id: battery_soc
    entity_id: sensor.deye_sunsynk_sol_ark_battery_state_of_charge
  - platform: homeassistant
    id: my_weather
    entity_id: input_text.current_wx_icon
  - platform: homeassistant
    id: pv_today
    entity_id: sensor.pv_energy_daily
  - platform: homeassistant
    id: load_today
    entity_id: sensor.load_energy_daily
  - platform: homeassistant
    id: grid_in_today
    entity_id: sensor.grid_energy_in_daily
  - platform: homeassistant
    id: grid_out_today
    entity_id: sensor.grid_energy_out_daily

############ Get the entities from Home-Assistant you want to display ############


spi:
  clk_pin: 14
  mosi_pin: 13
  miso_pin: 12


############ Add the images to display on screen ############
image:
  - file: "dining-room-display/menu1.png"
    id: menu
    resize: 320x240
    type: RGB24
  - file: "dining-room-display/Arrow-Left.png"
    id: arrow_left
    resize: 320x240
    type: RGB24
  - file: "dining-room-display/Arrow-Right.png"
    id: arrow_right
    resize: 320x240
    type: RGB24
############ Add the images to display on screen ############

############ Define and give some colours a name ############
color:
  - id: my_red
    red: 100%
    green: 0%
    blue: 0%
  - id: my_color
    red: 100%
    green: 100%
    blue: 0%
  - id: my_green
    red: 0%
    green: 100%
    blue: 0%
  - id: my_blue
    red: 0%
    green: 0%
    blue: 100%
  - id: my_white
    red: 100%
    green: 100%
    blue: 100%
############ Define and give some colours a name ############

############ Now we get to what to show on the display ############
display:
  - platform: ili9xxx
    model: ili9341
    dc_pin: 2
    cs_pin: 15
    rotation: 90
    lambda: |-
      // Show background Image
      it.image(0, 0, id(menu)); # Main background image
      // Grid Power > 0
      if (id(grid_power).state >= 0){
          it.image(200, 180, id(arrow_left)); # show left arrow
          it.printf(240, 195, id(font3), id(my_red), "%.0f%W", id(grid_power).state);  }
      // Grid Power < 0
      if (id(grid_power).state <= 0){
          it.image(200, 180, id(arrow_right));  # show right arrow
          it.printf(240, 195, id(font3), id(my_green), "%.0f%W", id(grid_power).state); }

      if (id(battery_soc).state >= 30){
          it.printf(145, 10, id(font3), id(my_white), "%.0f%%", id(battery_soc).state);  }
      if (id(battery_soc).state <= 30){
          it.printf(145, 10, id(font3), id(my_red), "%.0f%%", id(battery_soc).state); }


      if (id(battery_power).state >= 0){
          it.image(60, 180, id(arrow_left));
          it.printf(15, 195, id(font3), id(my_white), "%.0f%W", id(battery_power).state);  }
      if (id(battery_power).state <= 0){
          it.image(60, 180, id(arrow_right));
          it.printf(15, 195, id(font3), id(my_red), "%.0f%W", id(battery_power).state); }


      it.image(200, 60, id(arrow_right));
      it.image(60, 60, id(arrow_right));
      it.printf(240, 90, id(font3), id(my_color), "%.0f%W", id(load_power).state);
      it.printf(240, 115, id(font4), id(my_color), "%.0f%kWh", id(load_today).state);
      it.printf(15, 90, id(font3), id(my_green), "%.0f%W", id(pv_power).state);
      it.printf(15, 115, id(font4), id(my_green), "%.0f%kWh", id(pv_today).state);
      it.printf(150, 103, id(font5), id(my_white), "%.2f", id(grid_in_cost).state);
      it.printf(150, 155, id(font5), id(my_white), "%.2f", id(grid_out_cost).state);
      // Print time in HH:MM format
      // Date Time Format https://esphome.io/components/time/index.html
      it.strftime(220, 30, id(font3), TextAlign::BASELINE_LEFT, "%a %H:%M", id(esptime).now());
      it.printf(120, 195, id(font4), id(my_red), "In:-%.0f%kWh", id(grid_in_today).state);
      it.printf(120, 215, id(font4), id(my_green), "Out:-%.0f%kWh", id(grid_out_today).state);
Save that config then click Install and choose Wirelessly.
If your OTA (Over The Air (Wirelessly)) has changed you must choose Plug into this computer as the OTA password will not allow you to use Wireless.
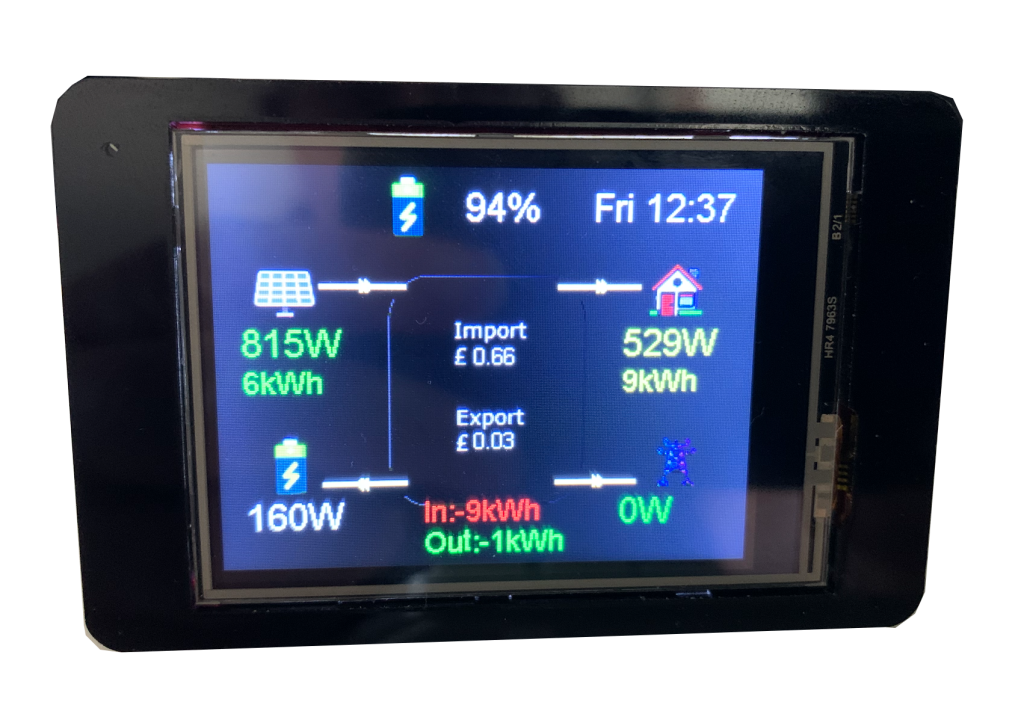
Once it has uploaded the display will reboot and once it connects to Home-Assistant it will look like this.
You can download the code from Here Which includes the original code inside the Factory folder
I have decided to put it next to the bed so I have added the following functionality.
When the Master bedroom light is on screen is off, when the master bedroom light is turned off the screen will turn off.
The screen can be toggled by pressing it if I want to see what is happening.
The new code is below.
esphome:
  name: "master-bedroom-room-display"
  friendly_name: Master Bedroom Room Display

esp32:
  board: denky32
  framework:
    type: arduino

# Enable logging
logger:

# Enable Home Assistant API
api:
  encryption:
    key: !secret api_key

ota:
  password: !secret ota_password

wifi:
  ssid: !secret wifi_ssid
  password: !secret wifi_password

  # Enable fallback hotspot (captive portal) in case wifi connection fails
  ap:
    ssid: "Dinind Room Display Hotspot"
    password: !secret web_server_password

captive_portal:

############ Put the Wifi settings into a text sensor ############
text_sensor:
  - platform: wifi_info
    ip_address:
      name: ESP IP Address
      id: ip_address
    ssid:
      name: ESP Connected SSID
      id: ssid
  - platform: homeassistant
    id: master_bedroom
    entity_id: light.master_bedroom
    on_value:
      then:
        - script.execute: refresh_led_default
############ Put the Wifi settings into a text sensor ############

############ Create a web page to monitor the device for fault finding ############
web_server:
  version: 2
  port: 80
  auth:
    username: admin
    password: !secret web_server_password
############ Create a web page to monitor the device for fault finding ############

############ Add some standard fonts ############
font:
  - file: 'fonts/slkscr.ttf'
    id: font1
    size: 10

  - file: 'fonts/BebasNeue-Regular.ttf'
    id: font2
    size: 48

  - file: 'fonts/arial.ttf'
    id: font3
    size: 22

  - file: 'fonts/arial.ttf'
    id: font5
    size: 13

  - file: 'fonts/arial.ttf'
    id: font4
    size: 18
############ Add some standard fonts ############

############ Add a switch to reboot from Home-Assistant and set the LED states on the board ############
switch:
  - platform: restart
    name: "${device_name} Restart"
  - platform: gpio
    name: "led"
    id: led24
    pin: 25
    inverted: no
    restore_mode: ALWAYS_OFF
  - platform: gpio
    name: "Back Light"
    id: bck24
    pin: 27
    inverted: no
    restore_mode: ALWAYS_ON

############ Add a switch to reboot from Home-Assistant and set the LED states on the board ############

i2c:
  sda: 22
  scl: 21

############ Get the entities from Home-Assistant you want to display ############
time:
  - platform: homeassistant
    id: esptime

sensor:
  - platform: homeassistant
    id: pv_power
    entity_id: sensor.deye_sunsynk_sol_ark_pv_power
  - platform: homeassistant
    id: load_power
    entity_id: sensor.deye_sunsynk_sol_ark_load_power
  - platform: homeassistant
    id: battery_power
    entity_id: sensor.deye_sunsynk_sol_ark_battery_power
  - platform: homeassistant
    id: grid_power
    entity_id: sensor.deye_sunsynk_sol_ark_grid_power
  - platform: homeassistant
    id: grid_in_cost
    entity_id: sensor.grid_cost_cost
  - platform: homeassistant
    id: grid_out_cost
    entity_id: sensor.grid_out_saving_cost
  - platform: homeassistant
    id: battery_soc
    entity_id: sensor.deye_sunsynk_sol_ark_battery_state_of_charge
  - platform: homeassistant
    id: my_weather
    entity_id: input_text.current_wx_icon
  - platform: homeassistant
    id: pv_today
    entity_id: sensor.pv_energy_daily
  - platform: homeassistant
    id: load_today
    entity_id: sensor.load_energy_daily
  - platform: homeassistant
    id: grid_in_today
    entity_id: sensor.grid_energy_in_daily
  - platform: homeassistant
    id: grid_out_today
    entity_id: sensor.grid_energy_out_daily


############ Get the entities from Home-Assistant you want to display ############


spi:
  clk_pin: 14
  mosi_pin: 13
  miso_pin: 12


############ Add the images to display on screen ############
image:
  - file: "images/menu1.png"
    id: menu
    resize: 320x240
    type: RGB24
  - file: "images/Arrow-Left.png"
    id: arrow_left
    resize: 320x240
    type: RGB24
  - file: "images/Arrow-Right.png"
    id: arrow_right
    resize: 320x240
    type: RGB24
############ Add the images to display on screen ############

############ Define and give some colours a name ############
color:
  - id: my_red
    red: 100%
    green: 0%
    blue: 0%
  - id: my_color
    red: 100%
    green: 100%
    blue: 0%
  - id: my_green
    red: 0%
    green: 100%
    blue: 0%
  - id: my_blue
    red: 0%
    green: 0%
    blue: 100%
  - id: my_white
    red: 100%
    green: 100%
    blue: 100%
############ Define and give some colours a name ############

############ Now we get to what to show on the display ############
display:
  - platform: ili9xxx
    model: ili9341
    dc_pin: 2
    cs_pin: 15
    rotation: 90
    lambda: |-
      // Show background Image
      it.image(0, 0, id(menu));
      // Grid Power > 0
      if (id(grid_power).state >= 0){
          it.image(200, 180, id(arrow_left));
          it.printf(240, 195, id(font3), id(my_red), "%.0f%W", id(grid_power).state);  }
      // Grid Power < 0
      if (id(grid_power).state <= 0){
          it.image(200, 180, id(arrow_right));
          it.printf(240, 195, id(font3), id(my_green), "%.0f%W", id(grid_power).state); }

      if (id(battery_soc).state >= 30){
          it.printf(145, 10, id(font3), id(my_white), "%.0f%%", id(battery_soc).state);  }
      if (id(battery_soc).state <= 30){
          it.printf(145, 10, id(font3), id(my_red), "%.0f%%", id(battery_soc).state); }


      if (id(battery_power).state >= 0){
          it.image(60, 180, id(arrow_left));
          it.printf(15, 195, id(font3), id(my_white), "%.0f%W", id(battery_power).state);  }
      if (id(battery_power).state <= 0){
          it.image(60, 180, id(arrow_right));
          it.printf(15, 195, id(font3), id(my_red), "%.0f%W", id(battery_power).state); }


      it.image(200, 60, id(arrow_right));
      it.image(60, 60, id(arrow_right));
      it.printf(240, 90, id(font3), id(my_color), "%.0f%W", id(load_power).state);
      it.printf(240, 115, id(font4), id(my_color), "%.0f%kWh", id(load_today).state);
      it.printf(15, 90, id(font3), id(my_green), "%.0f%W", id(pv_power).state);
      it.printf(15, 115, id(font4), id(my_green), "%.0f%kWh", id(pv_today).state);
      it.printf(150, 103, id(font5), id(my_white), "%.2f", id(grid_in_cost).state);
      it.printf(150, 155, id(font5), id(my_white), "%.2f", id(grid_out_cost).state);
      // Print time in HH:MM format
      // Date Time Format https://esphome.io/components/time/index.html
      it.strftime(220, 30, id(font3), TextAlign::BASELINE_LEFT, "%a %H:%M", id(esptime).now());
      it.printf(120, 195, id(font4), id(my_red), "In:-%.0f%kWh", id(grid_in_today).state);
      it.printf(120, 215, id(font4), id(my_green), "Out:-%.0f%kWh", id(grid_out_today).state);

touchscreen:
  platform: xpt2046
  id: my_touchscreen
  cs_pin: 33
  on_touch:
    then:
    - switch.toggle: bck24

script:
  - id: refresh_led_default
    mode: restart
    then:
      - switch.turn_off: bck24

      - if:
          condition:
            #lambda: "return (${relay_count}>1 && id(relay_1).state) ;"
            #lambda: 'return "${living_room}.state" == "on";'
            lambda: 'return id(master_bedroom).state == "on";'
          then:
            - script.execute: led_on
          else:
            - script.execute: led_off

  - id: led_on
    mode: restart
    then:
      switch.turn_on: bck24

  - id: led_off
    mode: restart
    then:
      switch.turn_off: bck24